EN
EN UA
UA


 Login
Login 
Printing labels on a Godex printer in the Cloud cabinet
Preparation for Work
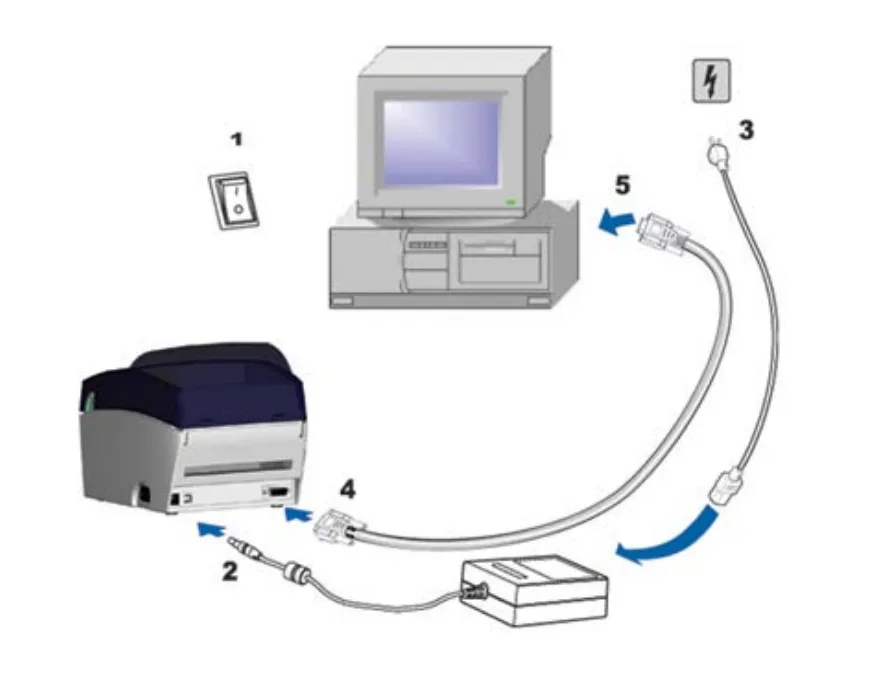
Connecting the Printer to a PC
Make sure the power switch (1) is turned off.
Connect the power cable (3) to the electrical outlet and to the power supply, then connect the power supply to the printer (2).
Connect the printer to the computer using a USB port.
Turn on the printer. The LED indicator should light up.
Driver Installation
Download the driver from the manufacturer’s website using the provided link.
After downloading the driver, go to the folder where it was saved:
Run the downloaded file.
Select “Install printer drivers” to start the installation process.
Choose your printer model and continue the installation.
Specify the port used to connect the printer to the computer.
Enter the printer name. This name will be displayed in the “Printers and Faxes” folder.
Choose whether to share the printer with other network users and assign a share name.
Review the summary of the selected printer settings.
If all settings are correct, click “Finish” to begin copying the driver files.
After installation is complete, the new printer should appear in the “Printers and Faxes” folder.
Loading Labels and Calibration
Insert labels sized 60 × 40 mm into the printer.
Turn off the printer.
Press and hold the yellow Feed button on the printer.
While holding the Feed button, turn on the printer.
Continue holding the button for 30–40 seconds until a beep sounds.
Release the Feed button after the signal.
The printer will automatically calibrate according to the installed label size.
Navigating to the Label Printing Section
Log in to the Cloud system.
Go to the menu:
Directories → Other → Price Tag Printing
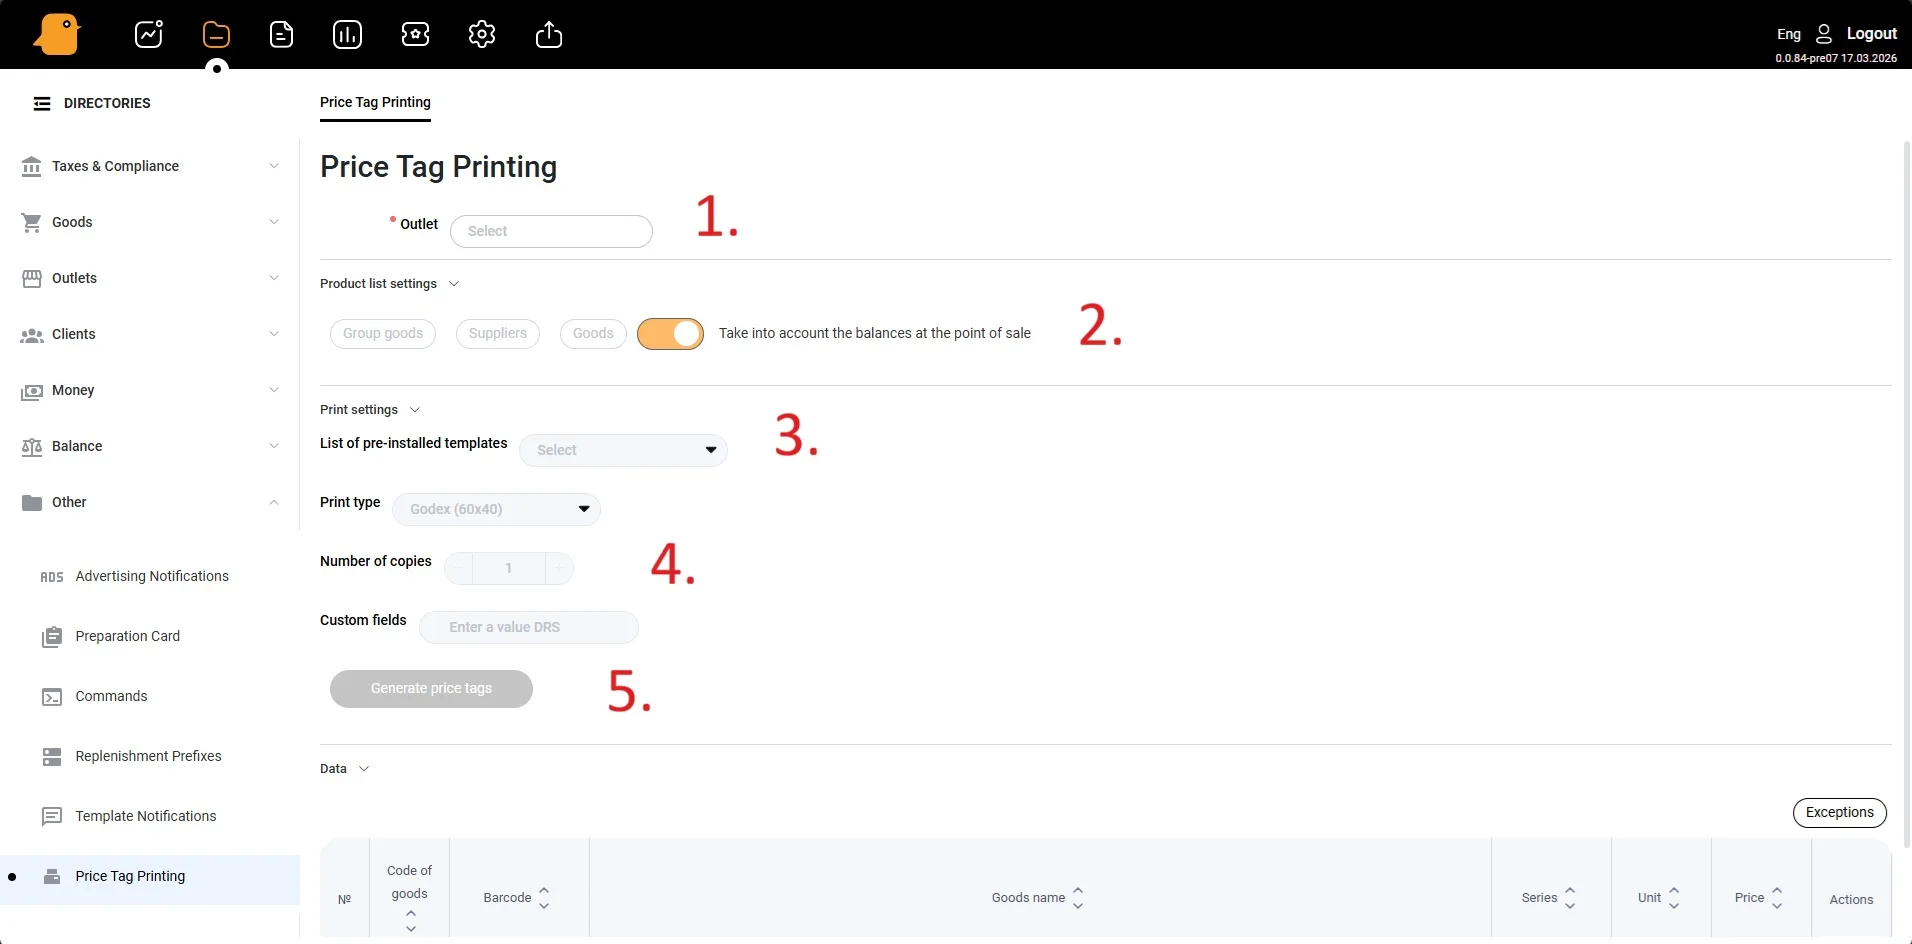
Printing Labels
1. Selecting a Store Location
1. Selecting a Store Location
In the Store Location field, select the location for which you want to print labels.
2. Selecting Products
In the Settings section, select the products for label printing. You can choose:
by product group;
by supplier;
by selecting individual product cards.
3. Selecting a Print Template
In the Templates list, select the template to be used for printing labels.
In the Print Type field, select Godex.
4. Setting the Number of Copies
In the Number of Copies field, specify the required number of label copies.
5. Creating and Printing Labels
Click Create Price Tags.
In the print window, select the Godex printer.
Click Print.
After that, the system will generate a print file, and the labels will be printed on the selected printer.