EN
EN UA
UA


 Login
Login 
Printing price tags on an A4 printer in the Cloud cabinet
Preparation for Work
For printing price tags, you need to:
Connect the printer to the computer.
Install the printer drivers according to the manufacturer’s instructions.
Make sure the printer is displayed in the system and is ready for printing.
Go to the Price Tag Printing Section
Log in to the Cloud account.
Navigate to the menu:Directories → Other → Price Tag Printing.
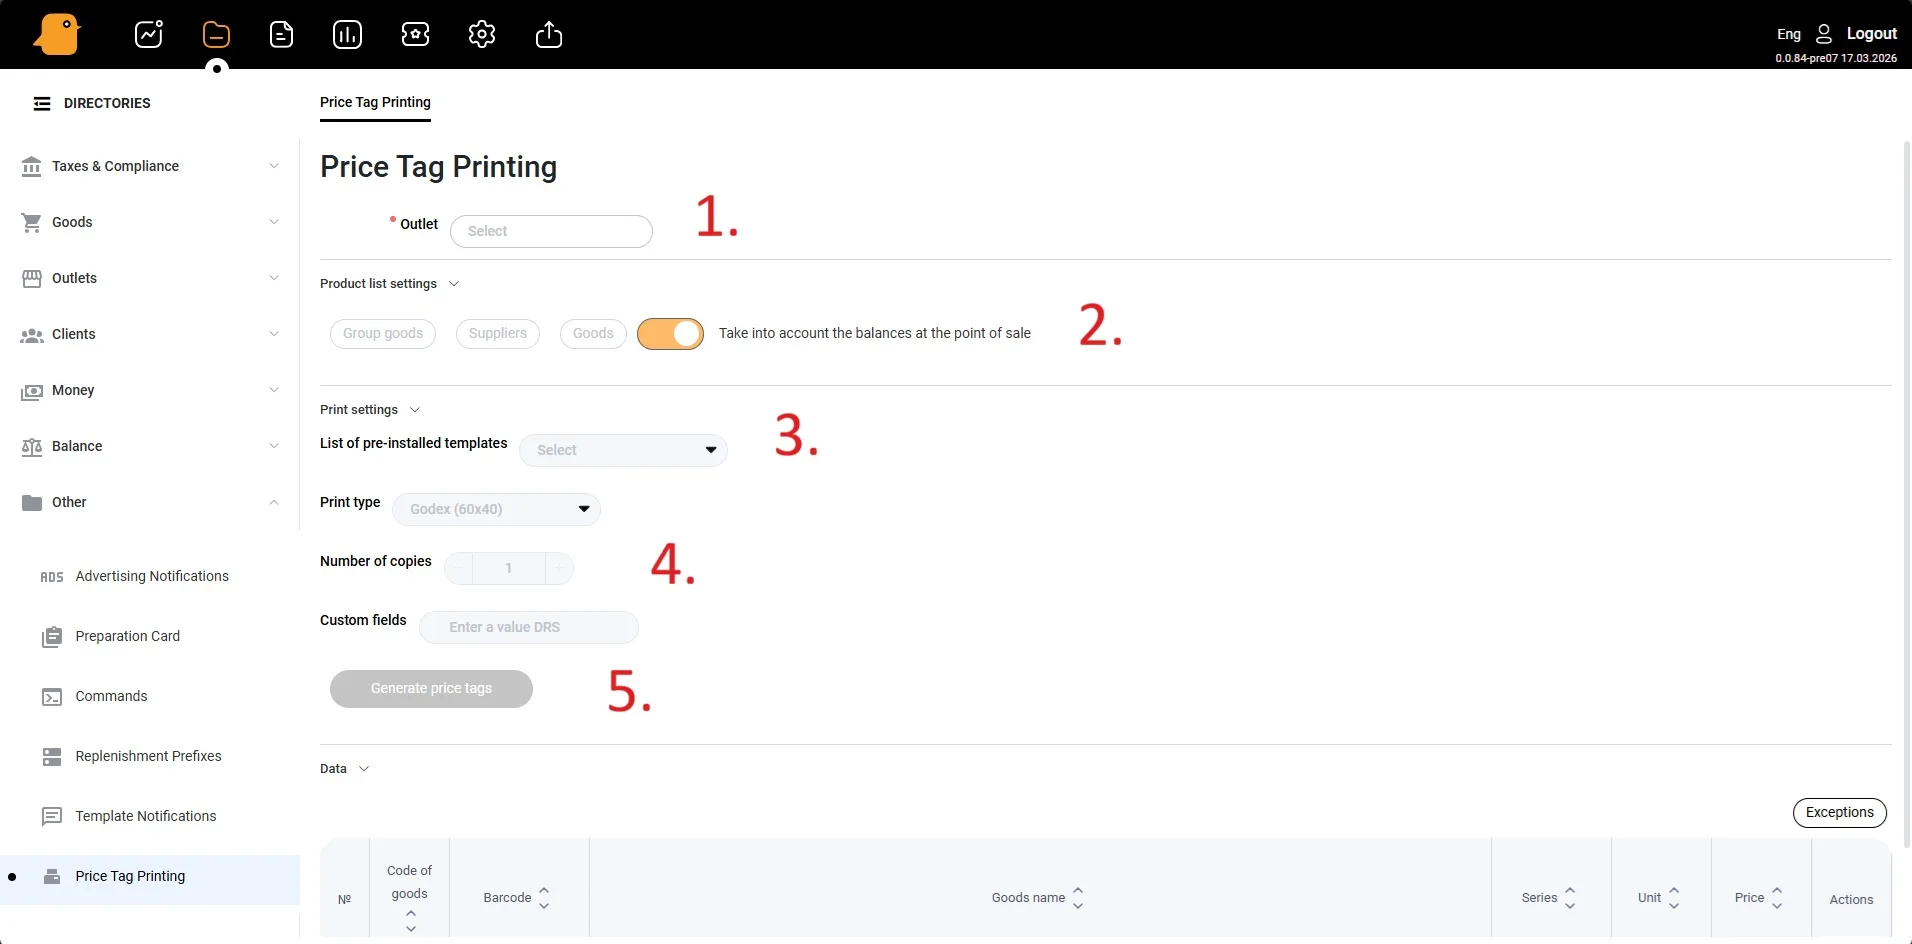
1. Select a Store Location
In the Store Location field, select the location for which you want to print price tags.
2. Product Selection
In the Settings section, product selection for printing price tags is available. You can choose products:
by product group;
by supplier;
select individual product cards.
3. Select a Print Template
In the Templates list, select the template to be used for printing price tags.
In the Print Type field, select A4 Grid.
4. Set the Number of Copies
In the Number of Copies field, specify the required number of copies of the price tags.
5. Create and Print Price Tags
Click the Create Price Tags button.
In the print window, select the printer to be used for printing.
Click Print.
After that, the system will generate a file for printing, and the price tags will be printed on the selected printer.