EN
EN UA
UA


 Login
Login 
Implementation and registration of sales
Adding products to the check
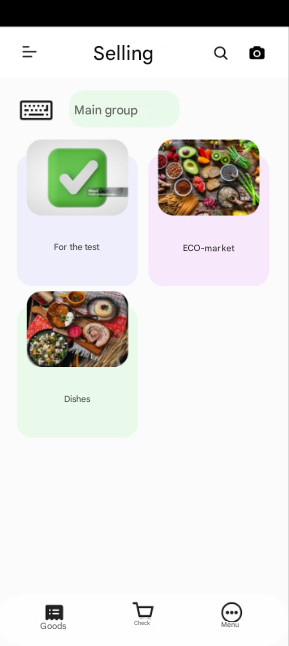
Entering a product into the check is done using the “Products” mode, which is represented by the corresponding icon.
Upon activation of this mode, available products are displayed, sorted by groups. The structure of the products is hierarchical – that is, the system has levels of nesting. It should be noted that all products / groups of products are entered in the office (in the corresponding directory Products).
Product search
The search for the necessary product in the application is carried out in the following ways:
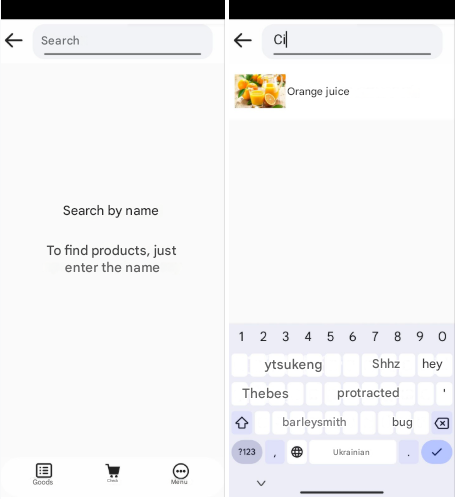
Search by product name (represented by the icon) – the user clicks on the “Magnifier” icon and the search window is opened. This window has a corresponding field for entering the product name, clicking on which opens a window with a corresponding field for entering the product name and a corresponding hint “To find products, just enter the name”. When the cursor is set, an on-screen keyboard appears for entering the product name
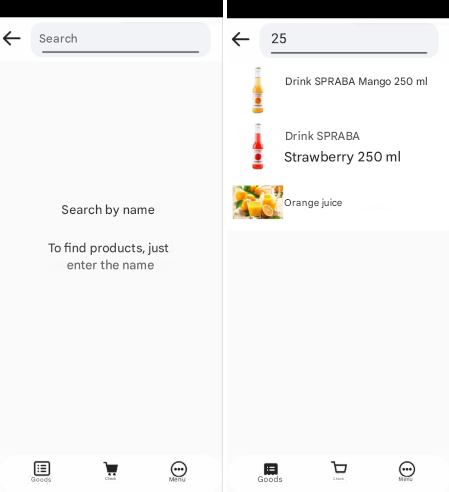
Search by internal product code (article) – (represented by the icon) – the user clicks on the “Magnifier” icon and the search window is opened. This window has a corresponding field for entering the product article, clicking on which opens a window with a corresponding field for entering the product article and a corresponding hint “To find products, just enter the name”. When the cursor is set, an on-screen keyboard appears for entering the product code
Search by barcode:
The user clicks on the “Magnifier” icon and the search window is opened. This window has a corresponding field for entering the product barcode, clicking on which opens a window with a corresponding field for entering the product barcode and a corresponding hint “To find products, just enter the name”. An on-screen keyboard appears for entering the product barcode when the cursor is set.
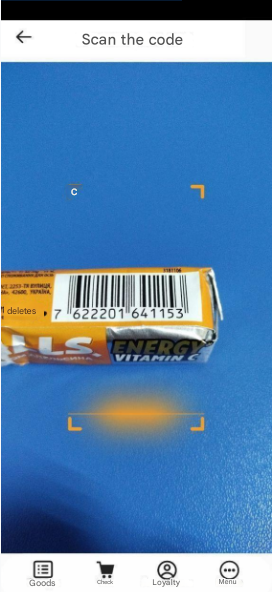
The user clicks on the “Camera” icon and the scanning window opens. In the scanning window, a rectangular area appears that should be brought to the product for its barcode to be read.
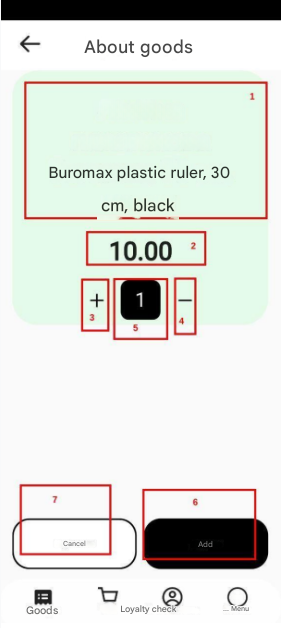
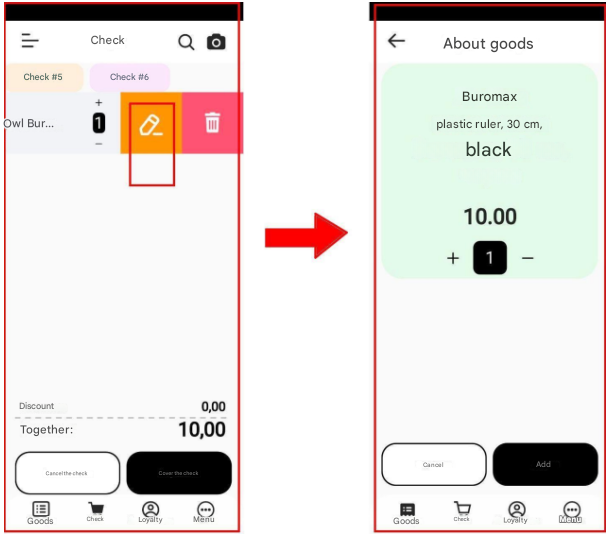
After the employee clicks on a product, the About Products window appears, which contains the following components:
1 – product name;
2 – product price;
3 – button to increase the quantity of the product;
4 – button to decrease the quantity of the product;
5 – current quantity of the product;
6 – Add button – button to add the product to the receipt;
7 – Cancel button – button to return to the previous window – the window with the product catalogue – closing the About Products window.
After selecting the necessary products and their quantity, the products are added to the receipt
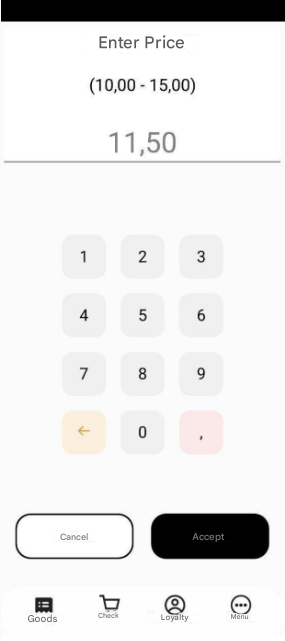
Adding products with a free price to the receipt.
The free price for a product should be determined at the product creation stage by specifying the attribute (checker) “Free price”.
Adding a product with a free price is completely identical to adding a regular product, except for the feature that will be mentioned below.
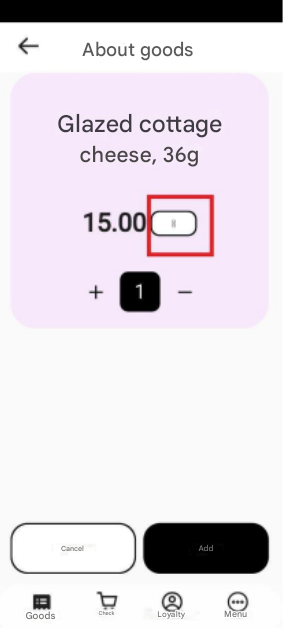
When clicking on this feature, the “Enter the price” window appears with a digital keyboard for entering the value and with the specified permissible price range (price compliance validation with the set range should be implemented):
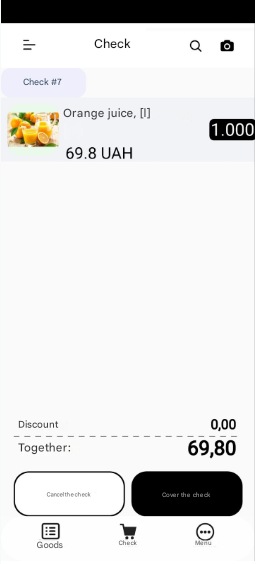
Changing the quantity of a product in an unclosed receiptUsing the “+” and “-“ keys, you can increase or decrease the quantity of the selected product. These keys are available directly in the line with the product or in the window with the pencil image that appears after sliding the line to the left
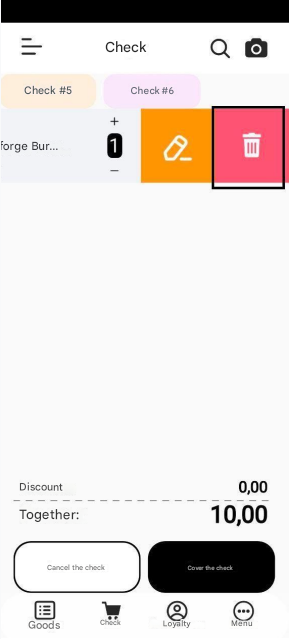
Removing a product from an unclosed receipt
If there is a need to remove a product from an unclosed receipt, you need to slide the line with this product to the left and activate the button with the image of the basket. When removing several items, this procedure is repeated the appropriate number of times.
Closing the receipt
The formed receipt is closed after choosing the form of payment (by clicking on the Close receipt button). The following types of payment are provided:
– cash;
– card.
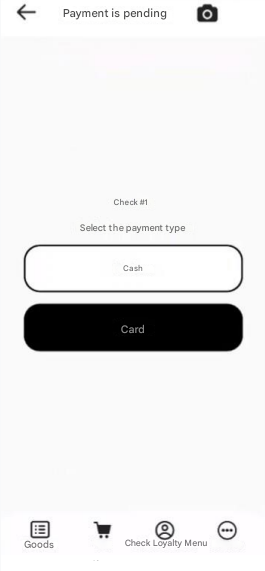
Also, the receipt number is displayed in this window.
Cash payment
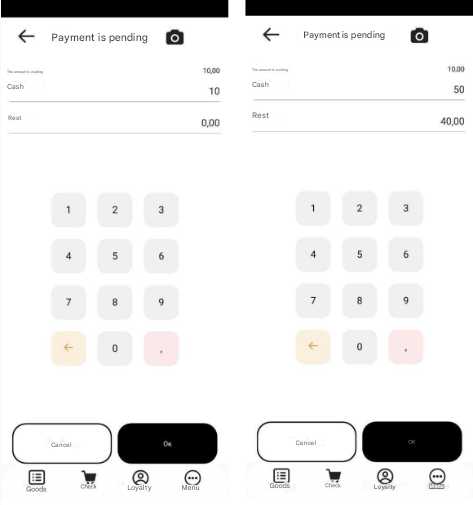
When choosing this means of payment, the cashier enters the amount of money received from the buyer using a digital keyboard. As the amount is entered, the change for the buyer is automatically calculated.
If the amount required to make a purchase is entered, the receipt is confirmed as closed.
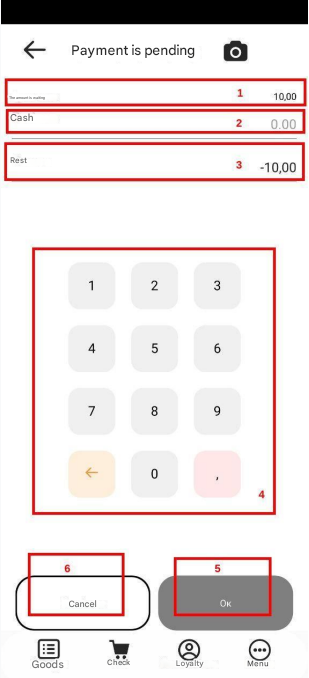
The “Payment of the receipt” window (cash) has the following components:
1 – the total amount of the receipt for the goods;
2 – cash received from the buyer (default 0.00), which changes to the value entered using the digital keyboard;
3 – the value of the change, which is automatically calculated when the sum issued by the buyer is entered (the sum issued by the buyer – the actual amount for the goods);
4 – a digital keyboard, which is used to enter the amount of money (cash) issued by the buyer;
5 – Ok button – confirms the payment of the receipt in cash;
6 – Cancel button – cancellation of the receipt, closing the current window, returning to the window with the selected product in the receipt
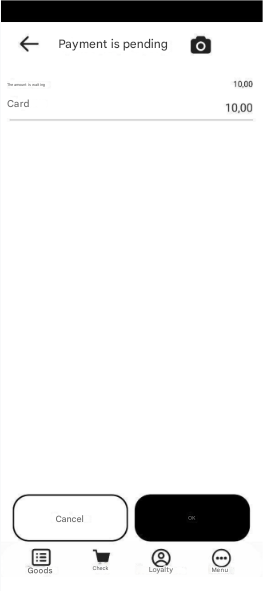
Cashless payment
This mode is activated by default. After choosing this type of payment to make a payment, the terminal must receive information either from a bank card in accordance with its type or using NFC technology.
NFC (Near Field Communication) – (ukr. “communication at short distances”) – is a wireless communication technology that allows data exchange at short distances. To find out if NFC is supported on a smartphone, you should select “Settings” → “Wireless networks” → “More”. If the smartphone supports NFC, you can see the corresponding item in the opened list.
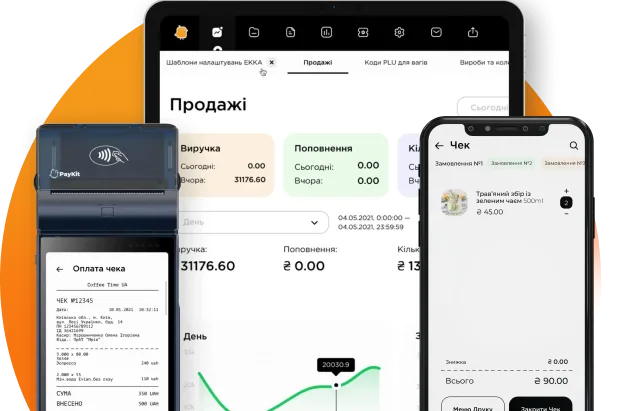
Printing the receipt
After confirming the closing of the receipt, a bank receipt is printed. If necessary, a duplicate of this receipt can be printed. After printing the bank receipt, a fiscal receipt is printed with its number indicated. The fiscal receipt is automatically sent to the fiscal service server.