EN
EN UA
UA


 Login
Login 
Setting up the PRRO
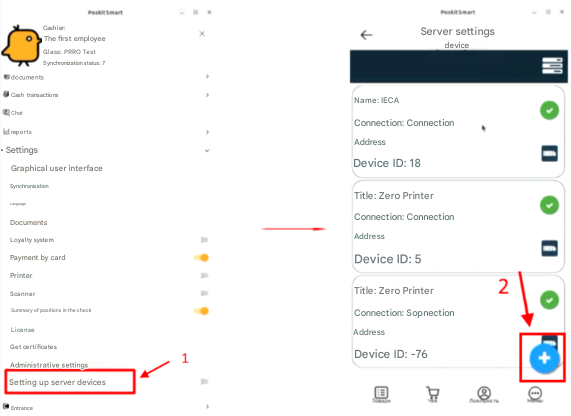
1. To set up PRRO, go to the Device Server Settings «1» in the settings menu
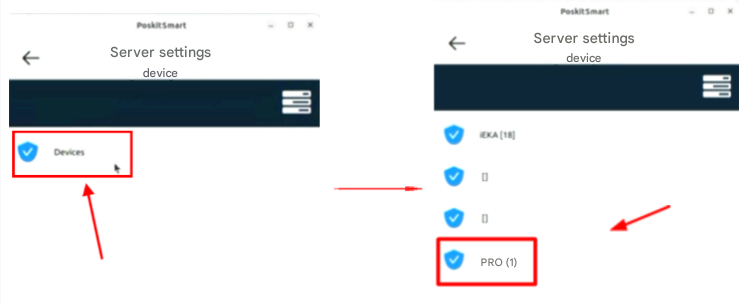
2. In the opened window, click the + button «2»
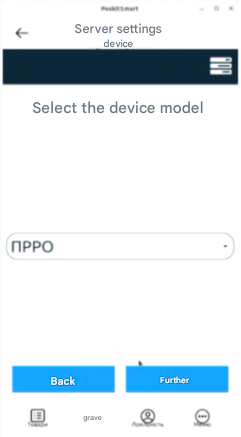
3. In the opened window, in the drop-down menu, select PRRO and click the Next button
4. To set up PRRO parameters, a device named «PRRO» will appear in the Device Server Settings window.
4.1. In the top right menu, select the Settings item «1»,«2»
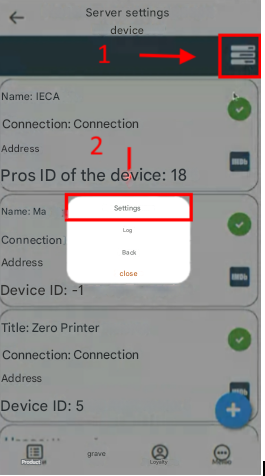
4.2. In the opened window, we choose the item Devices
4.3. In the next window, we choose the added PRRO
4.4. Next, the PRRO setting parameters window will open. We go to the General item
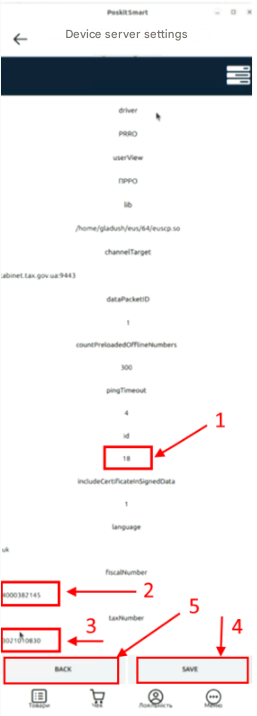
In the “General” setting window, we fill in/edit three parameters as shown in the picture
«1» – we put 18 in the id field;
«2» – we indicate the fiscal number;
«3» – we indicate the tax number.
Next, we save the entered information by clicking the Save button «4» and return to the previous menu by clicking Back «5»